We love stories. They affirm who we are. And we want affirmations that our lives have meaning. Here are 21 of my favorite photo tips to help you use holiday photos to share stories with family and friends. To download the PDF I created from this post, click here.
1. Make a list, check it twice
The best plan is to plan ahead. Start by thinking of the moments–in pictures–that you want to look back on. Then create a list of those moments. Moments such as:
- Christmas wreath
- Kids unwrapping presents
- Grandma’s apron
- Windows in the church
- Footprints in the snow
- Puppies playing with toys
- Decorating cookies
Your list then becomes your storyboard. Storyboards are the foundation of every Disney movie, Ken Burns documentary, and National Geographic article. If you need inspiration, go online, flip through magazines at the checkout stand. Look for new angles. They lend fresh impressions to familiar subjects and scenes.
2. Keep it simple
After 30 years of teaching photography, I think “keeping it simple” is my No. 1 tip. First, it’s not necessary to shoe-horn everything into a single frame. All that visual stuff overloads and confuses the viewer. Pause a second and ask yourself, “What do I like about this scene?” Is it Mom’s hands? Ornaments? Letters to Santa? The moose chomping on the outdoor Christmas lights? (Just kidding). Zero in on what you like, then move closer to fill the frame.
Example: A common mistake is to show people far away, across the room or yard). Practice de-cluttering your images, just like you’re going to de-clutter your closets after the New Year, right? Remember:
It’s not how much you cram into a photo, but what you consciously leave out.

3. Have you hugged your camera today?
It’s important to know your photo equipment. I can’t tell you how many times people have traveled to Kodiak Island to photograph wildlife, proudly toting a new camera, fresh out of the box. No clue how to use it. A surgeon wouldn’t enter the operating room unless she was familiar with every tool she’d be using.
Be prepared. Otherwise, you’ll miss golden opportunities. Are the batteries charged? Do you know what video settings to use? Are you comfortable using the tripod? Develop a relationship, you and your camera. Practice, practice, practice. You can’t learn how to ride a bicycle with the kickstand down.
4. Please, don’t say cheese!
It’s Christmas morning and your grandson is sitting by the tree opening presents. It’s a classic Kodak moment. You grab your camera and point it in his direction. “Say cheese!” He drops the gift, looks up, blinks and smiles. Sort of.
What just happened here? What did you take a picture of? A child unwrapping a gift? No. It’s a photo of a child who WAS unwrapping a gift. Confucius says, “A normal expression in a candid shot is better than a fake smile in a posed one.” Let’s train ourselves to NOT say “cheese.”
5. Let there be light
Light dispels darkness and without light, there are no photos. Play with light. Make friends with it. Front lighting, backlighting, side lighting. Night, day, sunrise, sunset, lamplight. What light is best for portraits? Full shade or overcast light.
6. How to prevent blurry photos
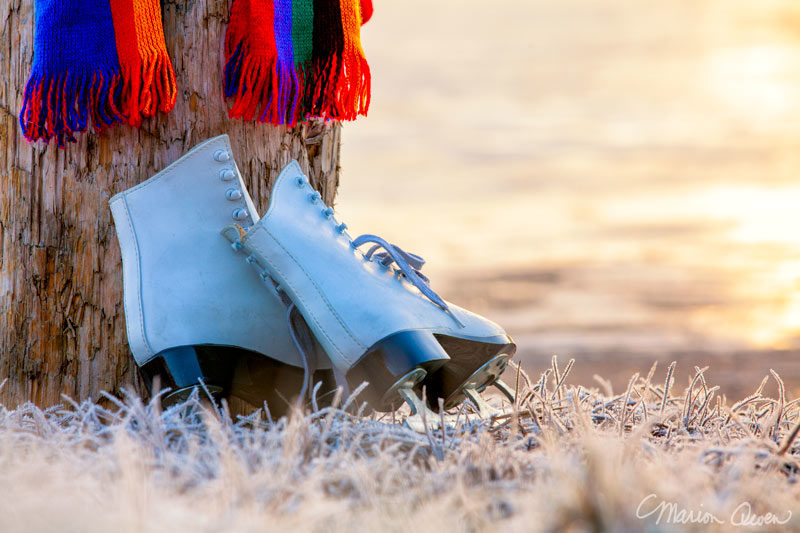
Drink too much caffeine and your photos might be blurry, but there’s another culprit: How you breathe. It’s common to tense up and hold your breath while focusing on a task. Just ask any tennis player. Here are a couple breathing tips while taking pictures: Relax your shoulders and your jaw. If necessary, use a tripod or brace yourself against a fridge or tree. Then, as you press the shutter, exhale s-l-o-w-l-y.
To download the pdf I created from this post, click here.
7. Where to put your subject?
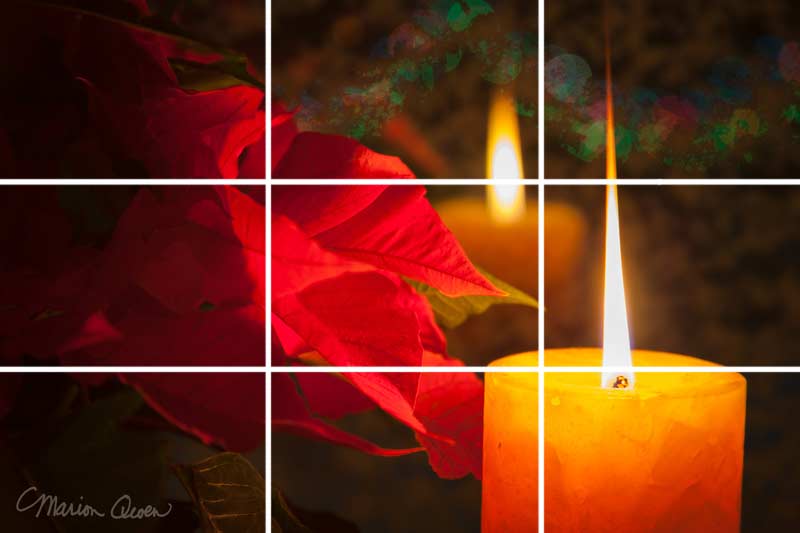
Rules of photography–of which there are thousands–aren’t cast in concrete. But if you want more appealing pictures, apply the Rule of Thirds. The Rule of Thirds is a classic tool for artists. Here’s what to do: Mentally divide the frame into a tic-tac-toe grid. Then place your subject not in the center, but near the intersection of any two lines.
For example, a beautiful candle sits on your coffee table in front of the Christmas tree. Take a picture of the candle in the center. Now move the candle to the right side of the frame with the Christmas tree on the left. Compare the two photos. Which one do you like best?
8. Point of view
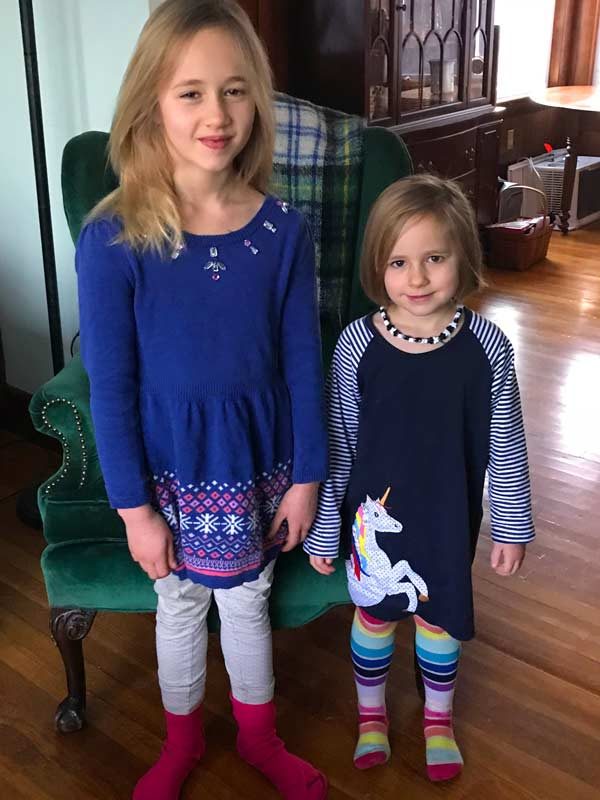
When your cat starts batting a tree ornament across the floor, hit the deck and take pictures. Same with kids. Eye level views connect with the viewer better than photos created by standing tall and looking down. They’re more real.
Speaking of looking down, see this photo of two grandkids? Nice, soft light. Perfect for portraits. Just one problem: Their heads are out of proportion, compared to their feet. The solution?_______________________.
9. Shoot moments, not poses
The best moments aren’t choreographed. So keep your camera or smartphone handy at all times. Anticipate action like a sports photographer: Take bunches of photos, especially of groups and families. Don’t be shy. You can always delete stuff later.
10. Add a little sparkle
So simple, yet so effective: Use candles and light to create an interesting background. Out-of-focus lights can add interesting sparkles and orbs behind your subject.

11. Variety is the spice of life
For a variety of looks, shoot horizontal and vertical photos; and the occasional pano. Movies, too. Remember your storyboard: Take a variety of different images styles of each situation. For example: Portraits, wide-angle shots, shots from up high, down low, action shots, zoomed-in details. Together they tell a whole story.

12. Plan a “before and after”
Before-and-after shots can be hysterical: A before and after picture of the dinner table; the living room before and after opening presents; snow to a snowman. It requires a little planning, but it’s well worth the giggles.
13. Line ’em up!
We stand in line for ice cream, draw lines in the snow, and drop a line to a friend. We love lines, and we turn to them for guidance. When it comes to looking at photos, our eyes naturally follow lines. Line affects how well and how long people visually “travel” around your photos. Lines can be curvy, straight, diagonal, zigzag, dotted, narrow, or loopy.
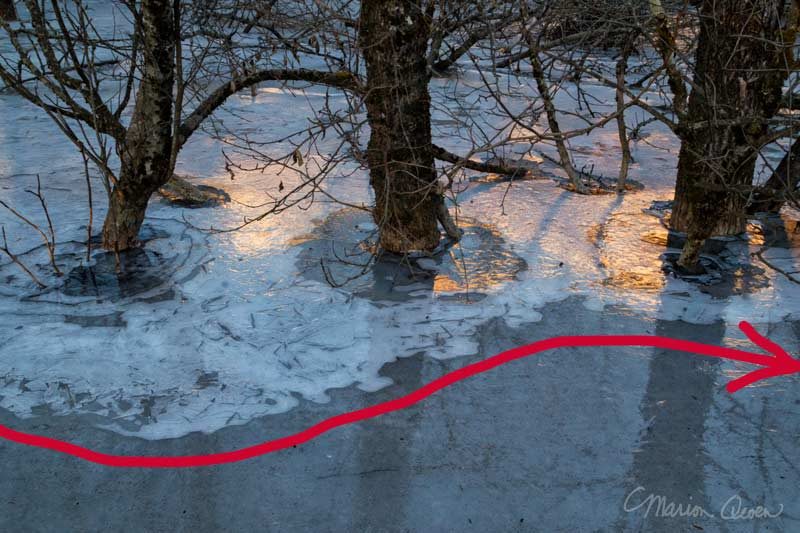
14. Take a time-lapse series
Set up your camera on a tripod. Focus on the Christmas tree or the dining room table, or the front lawn to capture a snowman-making event. How many shots to take? “It depends on how smooth you want the movement to be,” says my photographer friend Pam Foreman. “I’d say no fewer than one frame every five seconds, and maybe more like every two to three. The more frequent the shot, the less jerky the human movement.”
15. Small is beautiful
Macro photography reveals unseen worlds. Pine needles, snowflakes, candies, a baby’s fist. Get closer by zooming with your feet, not by zooming in with your camera. I’ve photographed snowflakes for 20 years and share my experiences through posts such as Ansel and the Snowflake.

16. The world is not flat, dear
Since photographs are flat, your job as a photographer is to create a sense of depth. The easiest way to do this is to include a foreground element: A tree branch, a coffee cup, a windsock, a crow. “Foreground” is awesome sauce.

17. Play with color
Are you tickled pink?
Feeling a little blue?
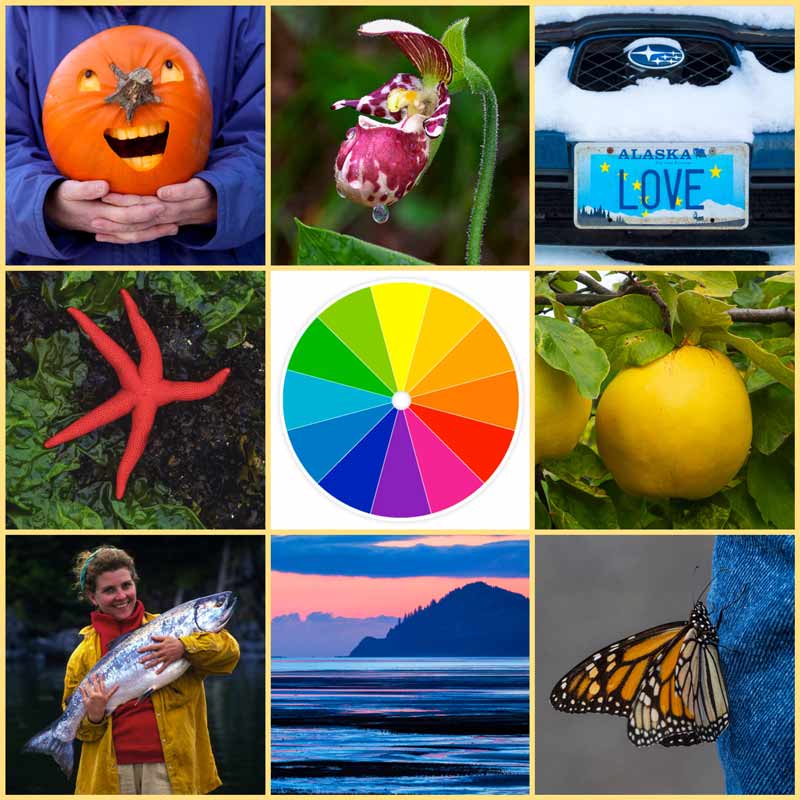
We respond emotionally to color, whether we realize it or not. Color has the power to make a photo feel cheery, exciting, sad or silly. Color draws attention to your subject. Yes, you can study color theory until you are blue (pun intended) in the face. But I’ve narrowed it down to two essential components:
- To create a photo with a mellow, calm feeling to it, select colors that are next to each other in the color wheel (analogous).
Examples: Yellow/orange. Blue/purple - To create a photo that’s as bouncy as a 2-year old, use colors that are opposite each other on the wheel (contrasting and complementary).
Examples: Red/green. Purple/yellow
Your assignment: Looking at the pictures below…
- Where are the colors located on the color wheel?___________________.
- How do the photos make you feel?________________________.
18. Tickle it with texture
I love to feature texture in my photographs, and looking for it is like a treasure hunt. Light plays a major role is how texture is recorded. Experiment with it. For example, take photos of snow on sunny days and overcast days. Texture is the next best thing to scratch-and-sniff photos on your computer screen.

19. The gift of a photograph
Parents and grandparents love photos of the family, pets, and children. And there are so many ways to share a photograph: Create a greeting card, print, book, photo ornament, coffee mug, poster…
20. Ask yourself this one, simple question…
When composing pictures, keep asking yourself, “How can I make this better? How can I make this better?”
21. Listen to your heart
When your heart tells you to pick up your camera and snap a photo, do it. Don’t hesitate, just “get the picture” as LIFE photographers were told. It may not be the perfect moment or the best angle. But at least you got the photo.
As for storytelling, Mister Rogers was a master. He always carried in his wallet a quote from a social worker that said, “Frankly, there isn’t anyone you couldn’t learn to love once you’ve heard their story.”
There you go. Tell your story in photographs.
I hope you find these examples helpful.
Cheers!

P.S. Where is your favorite place to spend the fall season? Write your thoughts as a comment below. Yay!
More resources and reading for you:
Photography in Alaska: A little bit about Alaska nature photography | Alaska photography tips
Sea otter fact to share with friends: Interesting facts about sea otters
Traveling to Alaska? Visit Kodiak! And our Cliff House BnB and our wildlife viewing boat trips
+ + + + + + + + + + + +
Marion Owen is a “Jill of all trades,” — on a mission to help busy people enhance their daily lives, condensing topics such as photography, cooking, and organic gardening into bite-size pieces. Get her free 4-page “In Good Light: Photo Tips for Busy People” and feel newly recharged when taking pictures.
